
Hack Metasploitable 2 and Hackfest 2019 from VulnHub
So, before I set the tone that I just am not a “group work” type of person let me just say that this past Fall 2 semesters (2019) I had the best group experience. It does happen, if all member care equally as much about the grade and are just as interested in the topic.
We were tasked with choosing a Virtual Machine on VulnHub and using the Penetration Testing Methodology to work through finding and exploiting a vulnerability in order to gain access to the machine. We were doing this in conjunction with classwork wherein we worked through doing the same using Metasploitable 2 as the target machine.
So, let’s work quickly and briefly through this, because like some other beginners it helps to know that there is a method to the madness and following said method aids in keep any penetration test on track. If you don’t you’ll be like me during the NCL CTF bashing your head against problems as if that’s the way to solve them.
Penetration Testing Methodology
Planning
For this step the parameters of the assignment were given to us. Work through the methodology steps in order to gain access to the given machines.
Reconnaissance
This step was accomplished through various Nmap scans. This is easier for Metasploitable 2 than it is for HackFest 2019 because with Metasploitable one can login to the machine and then run ifconfig to get the machine’s IP address. With the HackFest Machine you cannot login because credentials are not given to you. There are 2 ways that I know to solve this problem: easy and cheat.
The easy way is to use your source machine (hopefully Kali or Parrot) and run an Nmap scan against the broadcast IP of the network [this only works if both machines are on the same network, this is certainly more difficult in the wild, but easy in a VM Lab Set-up on their own network]. You can get the broadcast IP by running ifconfig on the source machine and noting the broadcast IP in the first line.
| nmap XXX.XXX.XXX.0/# |
The Cheat is by bringing up the machine’s information in the Virtual Machine Application both VirtualBox and VMWare will tell you the IP address assigned to the machines.
Once you have the IP address for the target machine then use either Nmap or Zenmap to scan the target. It might take a couple of scans to get both UDP and TCP open ports and all the running services.
I’ll show the scan commands, but we used Zenmap which craft the commands based on the scan that is chosen and then the scans can be saved using a dropdown menu.
Useful Nmap Scans at this point (note that these can be combined into fewer scans):
nmap -sT IP_Address (TCP connect Scan)
nmap -sU IP_Address (UDP ports)
nmap -A -sV IP_Address (Standard OS and Service Detection)
nmap -p- IP_Address (Scan ALL Ports)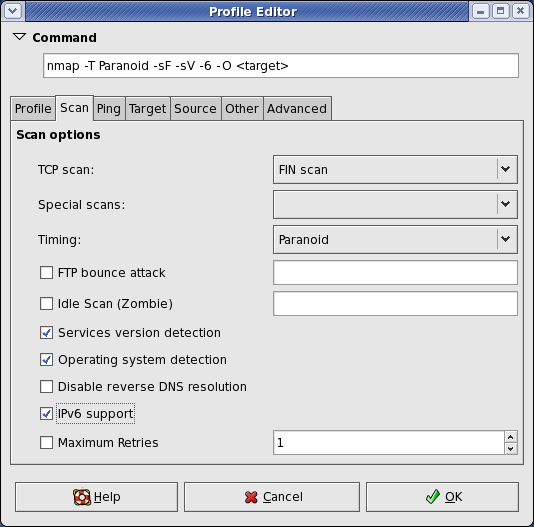
Vulnerability Analysis
When we finished with the scan we’re left with a good bit of information, a whole list of ports that appear to be open. There’s also some information on the Services running on these ports and the Operating System running on our machine. Depending on what’s running and the command used we can also get some additional information regarding scripts or insecure passwords or encryption being used.
With this port information we have a narrower view of what or where or vulnerabilities might lay. These initial scans give us a little bit more direction. I think of it as being in a long hall lined on both walls with a bunch of doors. The Nmap scan would be making all the ones that cannot open disappear. The OpenVAS vulnerability scan in a way tells you which are the easiest to open.
I won’t go through setting up OpenVAS because there are better guides than mine that walk-through doing this.
We used the web interface to run our scans, sometimes it seems a bit clunky and can be slow, but for beginners it’s pretty simple to navigate. Set the IP of the target machine as the target and run the scan. Ours took anywhere from 30 mins -1 hour to run our scans.
After the scans are run we get a good bit of information including a CVSS Base Score (0-10.0: None/Low-Critical) for the Machine and a list of vulnerabilities on the machine. Each vulnerability is scored, some have remediation steps if there are any, and most tell the user how the vulnerability might be exploited.

Exploitation
Now we know which doors can possibly unlocked, we just have to find the door that leads to where we need to go (usually privilege escalation) and not the ones that lead to the broom closet.
Although it is worth it to use the Metasploit Framework to work through exploitation on the Command Line again we’re new and in this class we used Armitage. I’ve done work in a previous class using Metasploit; Armitage is definitely easier. Armitage can take in your saved information from Nmap and OpenVAS and check for exploits and it can run automatic exploits to see if any work. Again, I’m not going to walk through setting up Armitage because this has been well traveled on the internet: here or here.
I will say that my partner also used WPScan because HackFest 2019 has a WordPress vulnerability. I didn’t so I’m not going to walk through that, but I’ll point you in the right direction for it.
Metasploitable 2 does not have a Word Press vulnerability. I won’t tell you where or which vulnerable connection, but there is a certain exploit that leads to a connection in which it is simple to escalate privilege to root and steal the shadow directory.
Promise, if I can do this, you can!
Post-Exploitation
One of the main activities at this point is to conduct some password cracking. We have the shadow directory information which should contain some usernames and hashes. Copy these into a text file and with Johnny (the GUI for John the Ripper) feed them in.
Reporting
Reporting might be a difficult part for some, but this really was the part to me where I shine. There are numerous examples of reports that can be found online. Also, how you write your report as far as content could depend on a number of factors including:
- The context of the testing (parameters and the like)
- The number of machines being tested
- The requests of the “client”
- The different methodology formats that one might follow; such as if following an outline by certain committees or “certifying” bodies.
It’s important that the report be detailed, but approachable. It also needs to include recommendations for remediation as well as all proof that the vulnerabilities and the exploits exists. For class we had screenshots, but it it was a professional report this might not work as well in the middle of the paper, but rather in an appendix or exhibit at the end.
Tools Used:
- Zenmap/Nmap
- OpenVas
- Armitage
- WPScan
- Johnny
- It is recommended by most professionals that one learn to do these things on the command line and not focus on the GUI, but I find that it is valuable to be able to do both. I am more comfortable with the GUI though.
